Please use this guide when instructed by your technician to set up the wireless on your printer.
1. Please make your way to the main screen of the printer and click on the information button.
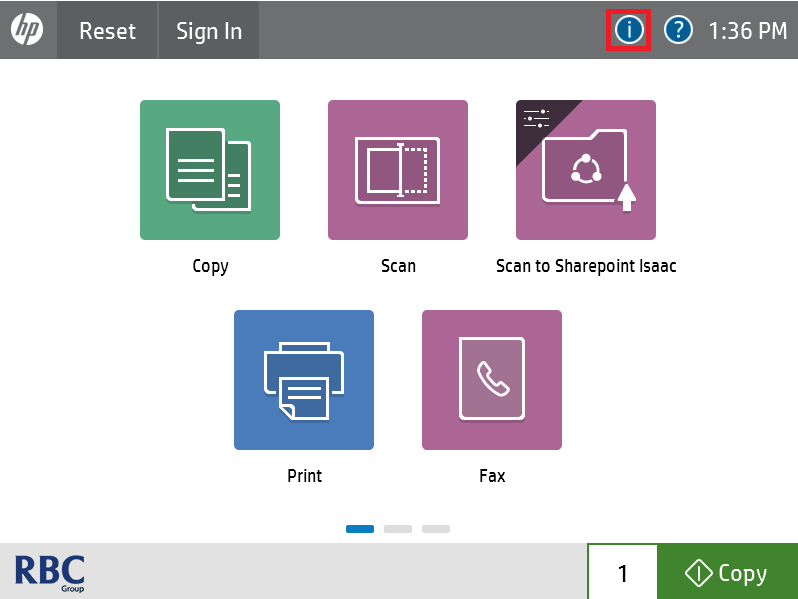
2. Once you see the next page please click on Wireless highlighted in red.
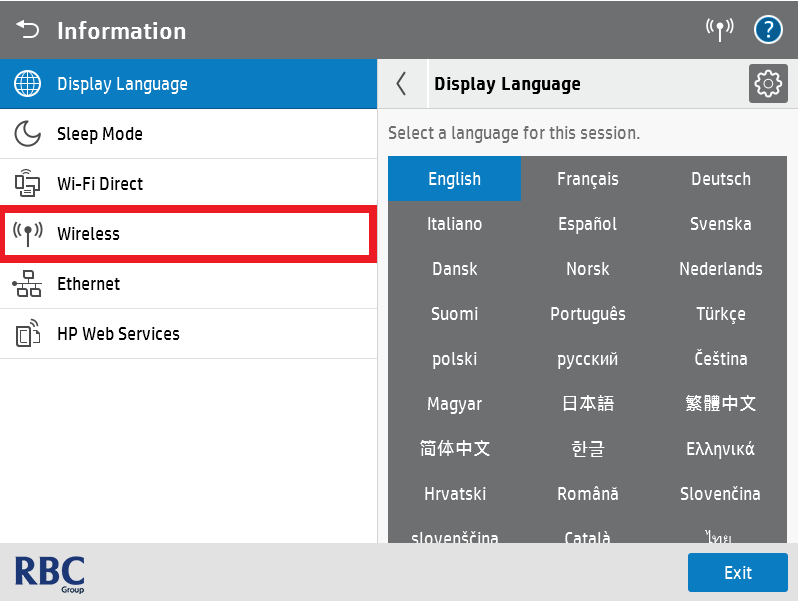
3. Please click on the cog in the top right-hand corner to go in to the settings menu.
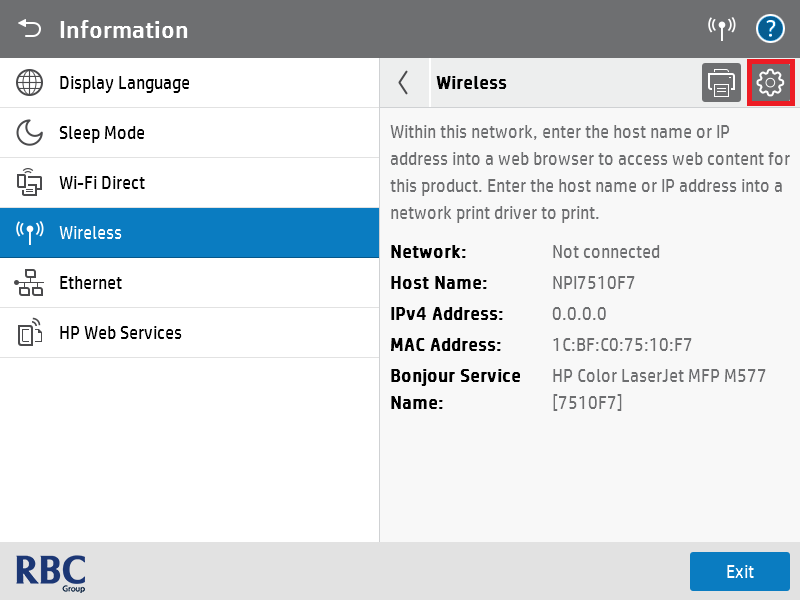
4. Please click on Wireless again highlighted in red.
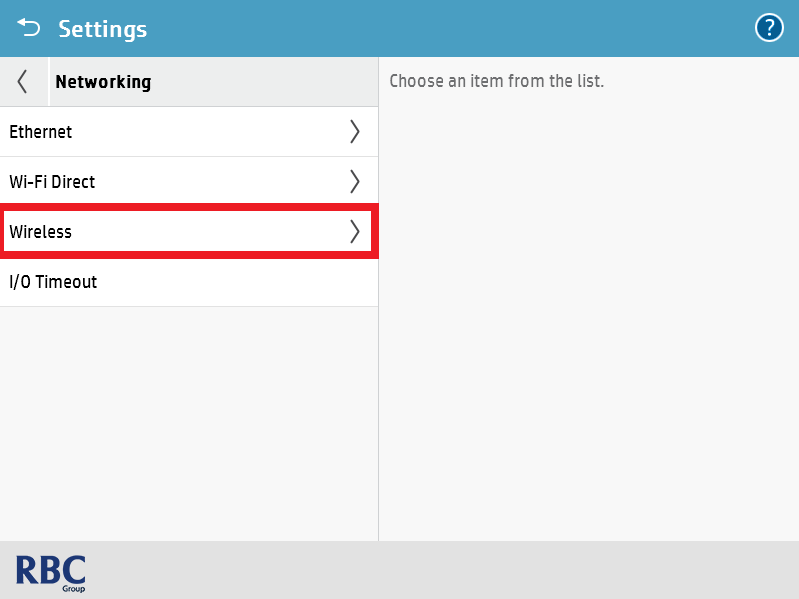
5. Once this has been selected click on Wireless Station.
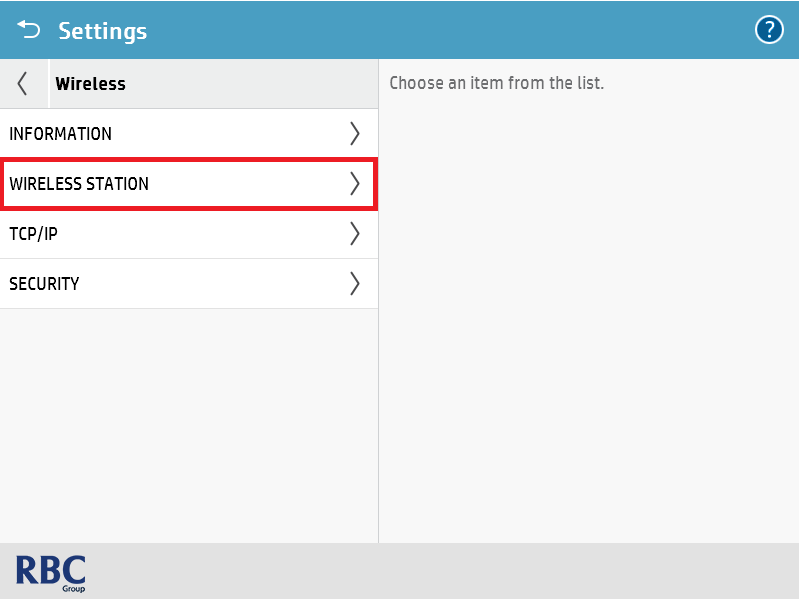
6. Click on SSID List highlighted in red.
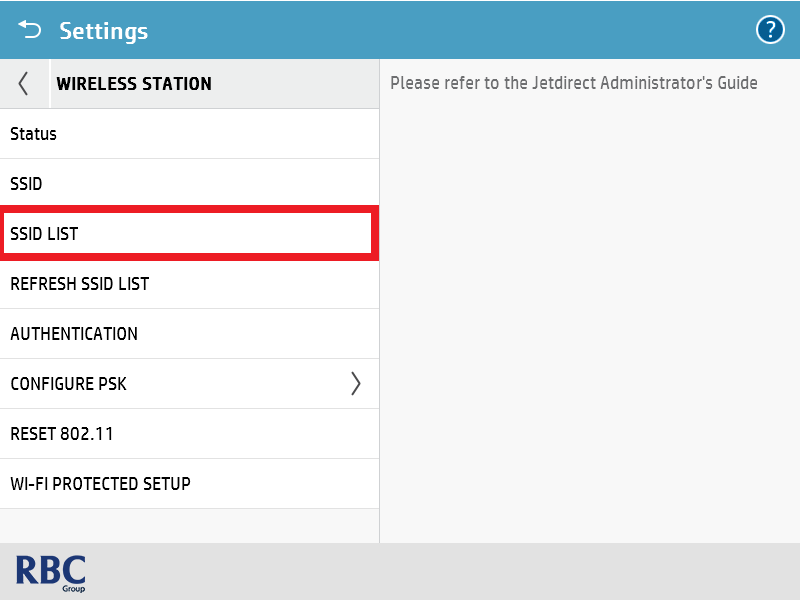
7. The printer will now display the Wi-Fi connections in a list, please select your desired Wi-Fi connection.
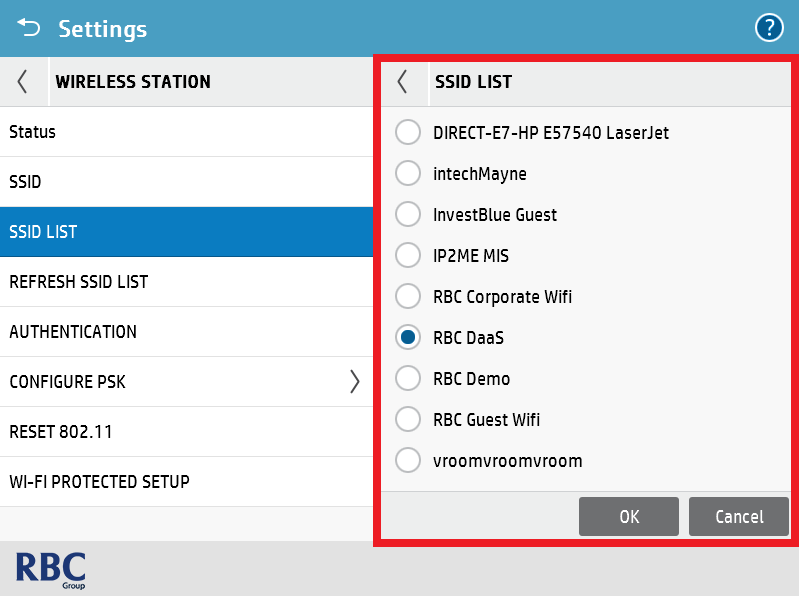
8. Please click on Authentication highlighted in the red rectangle; On the right-hand side of the screen click WPA-PSK.
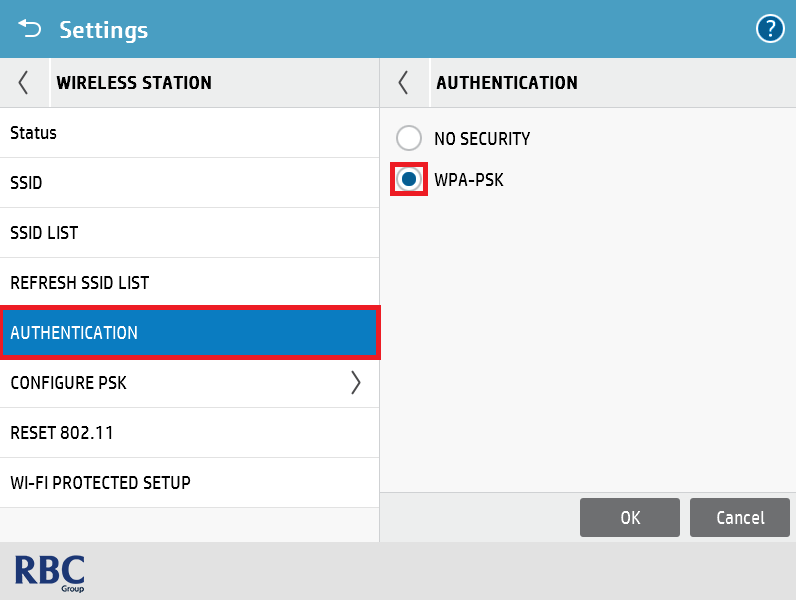
9. Please click on Configure PSK highlighted in red.
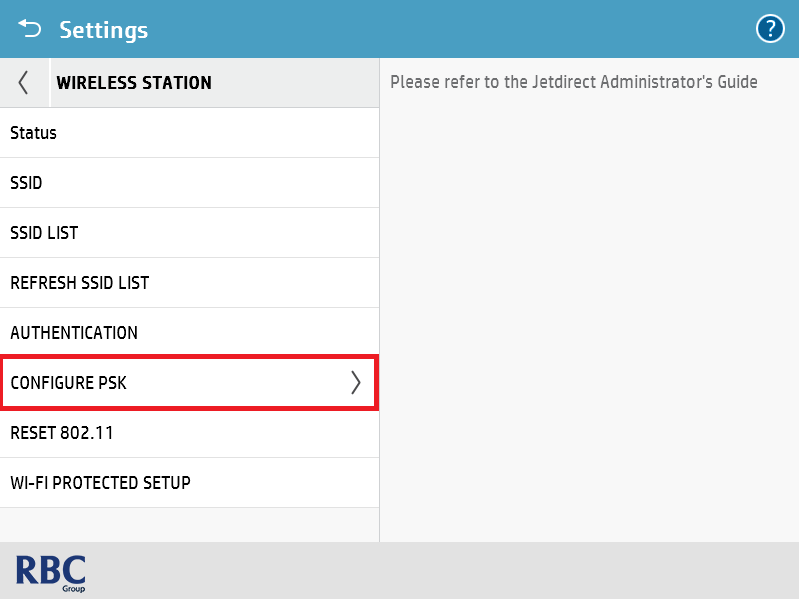
10. Please click on Passphrase highlighted in red.
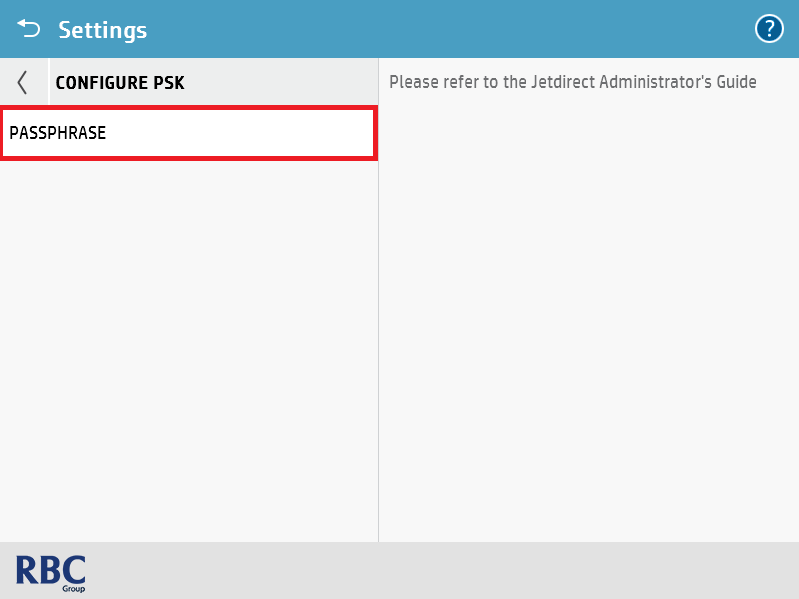
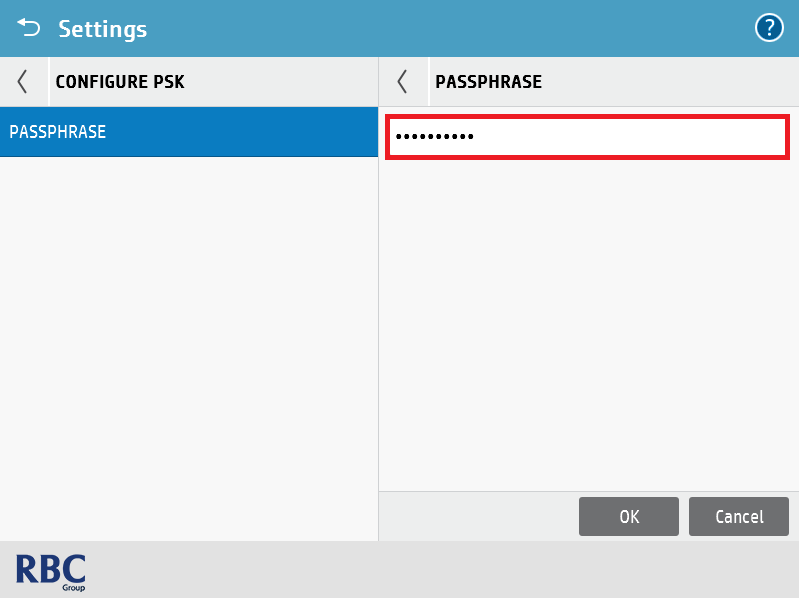
11. Please put in the password for your previously selected Wi-Fi network and press OK.
12. Once done, please proceed to restart the printer so that a new IP Address can be picked up by the printer. Please repeat step 1 and 2, then quote the IPv4 Address highlighted to the technician as they will require this when setting up your drivers for your device.
.png)