In order to test the quality of your prints directly from the printer, it is recommended to do a Colour Band Test from the printer. You will be occasionally advised by a support technician to retrieve this from the printer to speed up the process of your service call.
What does the Colour Band Test do? This test helps to identify if there are any issues coming from the drum units/photoconductor units of the printer which further helps the service technicians isolate the issue to provide quick one-time fixes. This can also help technicians identify if the issue is related to the software or hardware.
How to retrieve the Colour Band Test Pages
1. Firstly, on the control panel of the printer, click on Copier (Classic) as shown below.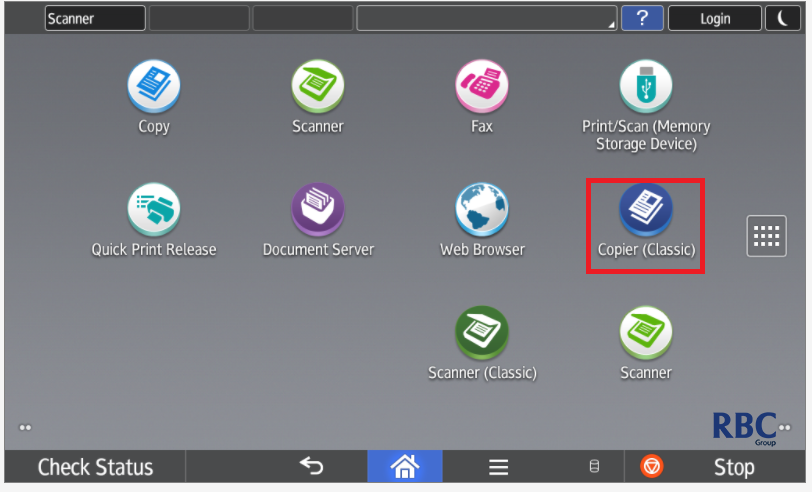
2. Once on the Copier (Classic) icon, the following page will appear.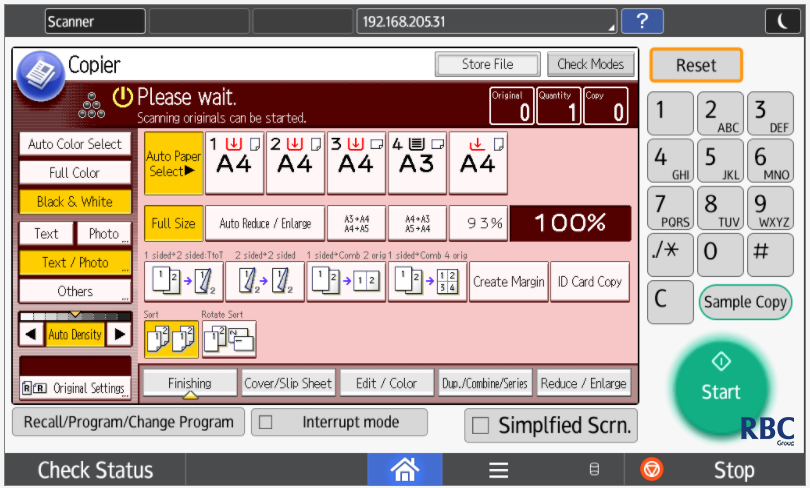
3. Click onto Edit/Color highlighted below.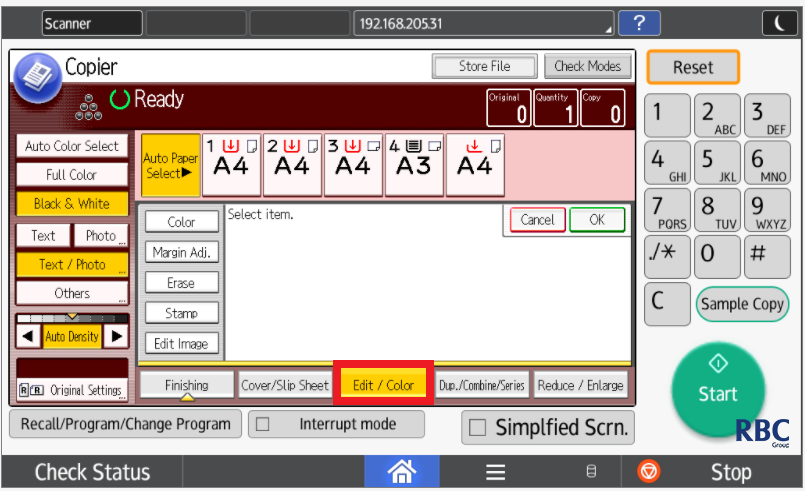
4. Click on the Color button and the below screen will show.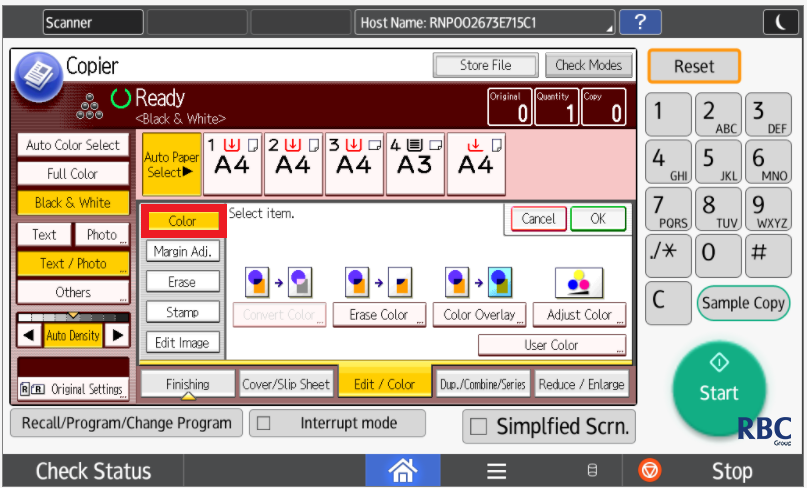
5. Once Color is highlighted choose the tray you would like to print from, selecting a tray with A4 paper is recommended for this print test.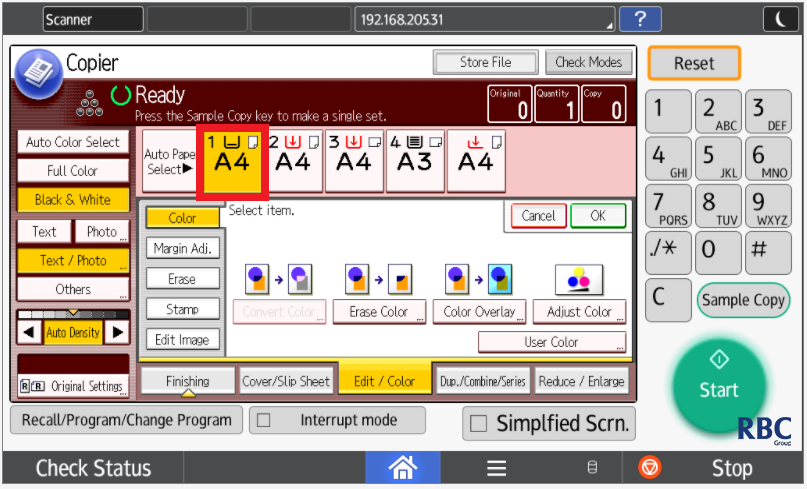
6. Click on Color Overlay as shown below.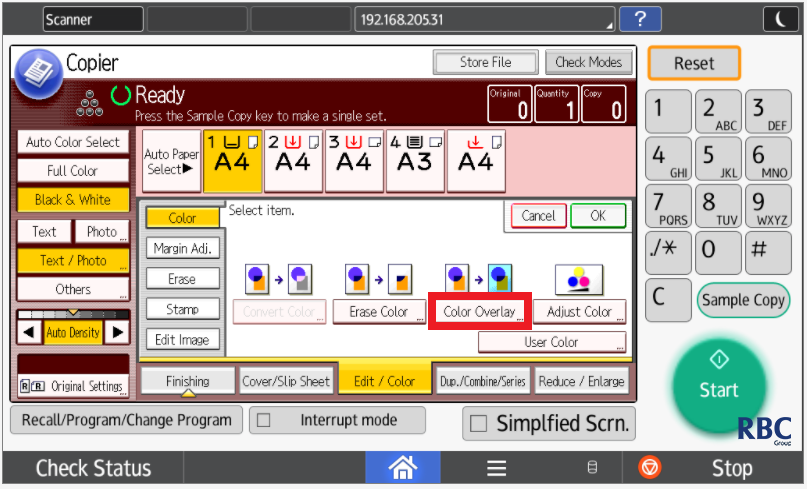
7. As seen in the picture below, you are required to change the settings to the lightest as highlighted in the red box.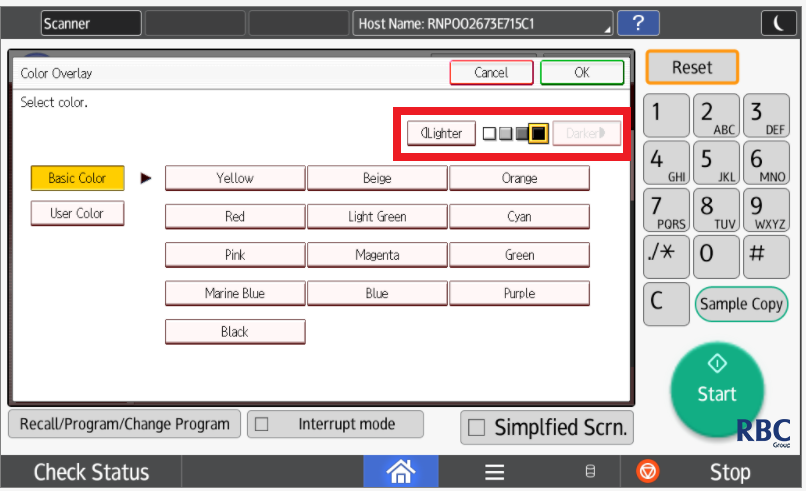
8. For the last step, we will select Yellow and press Start. This will print out the necessary page needed to complete the colour band test. After the Yellow has been printed, please repeat the process for Cyan, Magenta, and Black.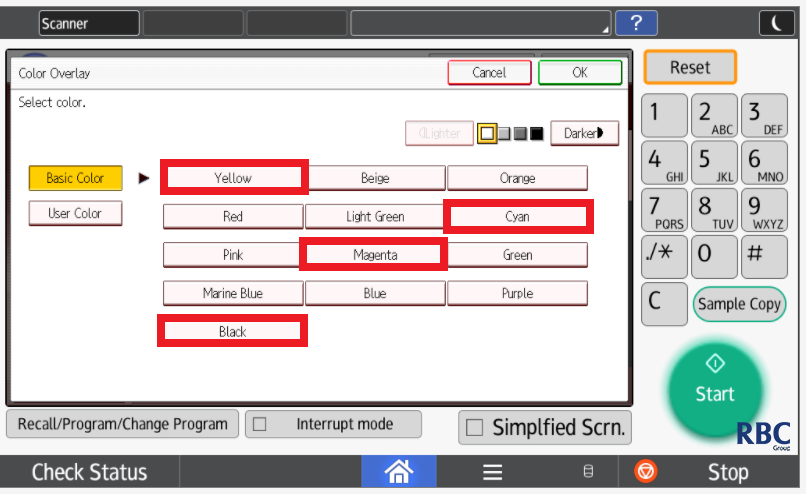 9. Once printed, please pass this onto the technician that has requested for these tests or send these through to support if you notice anything that looks out of place. Please log a call if needed using the button below.