Is there a situation where you can't print to your printer and suspect that it might not be connected to the network? This is easy to tell if no one in the office is able to print to the printer at all and your scan to emails aren't sending through.
How can you check to see if your printer is not connected to the network? Please follow the steps below:
Steps to check Printer Connectivity
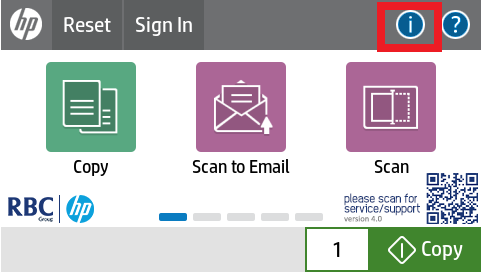
1. Please click the  button at the top right hand corner of the Home Page.

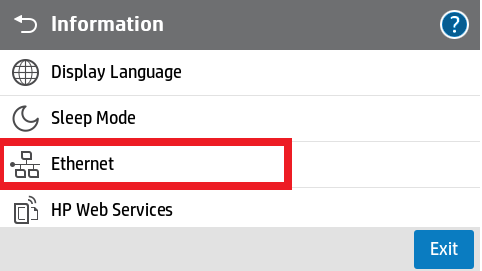
2. Select the Ethernet tab along the left hand side.
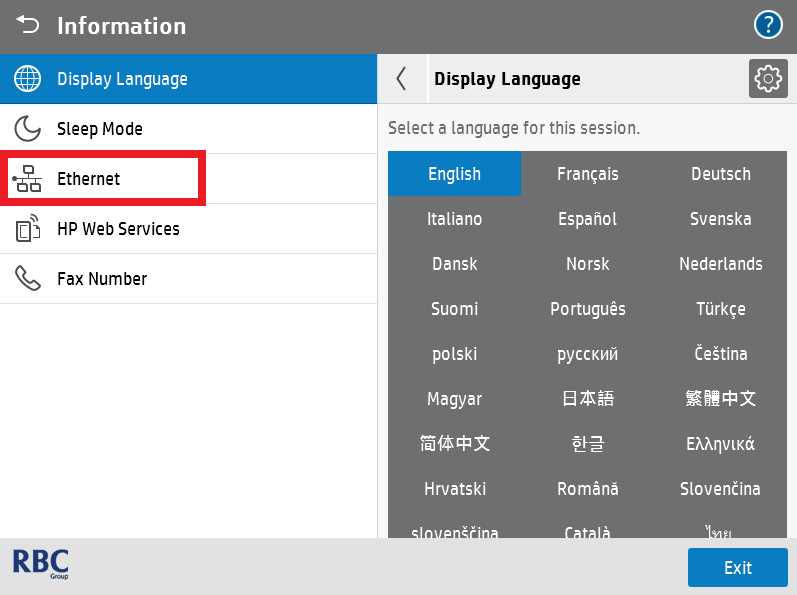
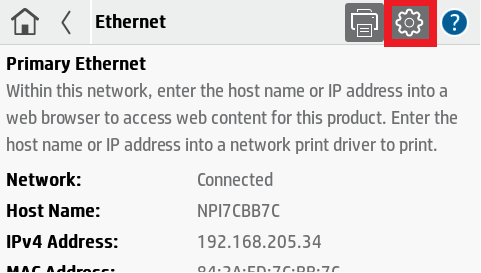
3. You will see next to Network if this is connected.

If the above shows Not Connected, please firstly ensure that the ethernet cable of the printer is connected behind the printer as shown below. Check that your internet port is active as well with either your IT or with your Internet Service Provider (ISP).

If it is connected and the network is still showing Not Connected, please log a support with the button below and have this article handy when you speak to a technician as it may be an IP Conflict:
Printer to be set to DHCP to check for IP Conflicts
Set HP Printer to DHCP
Getting a printer on DHCP allows for it to automatically identify the network (IPV4, Subnet, Default Gateway) and receive a new IP Address if it hasn't receive one. This could be due to network changes or reservations of the original IP Address of the printer.
HP A3/A4 Enterprise Printers
1. Please click the  button at the top right hand corner of the Home Page.

2. Select the Ethernet tab along the left hand side.

3. Select the Settings Cog Icon on the top right hand side of the Ethernet tab.
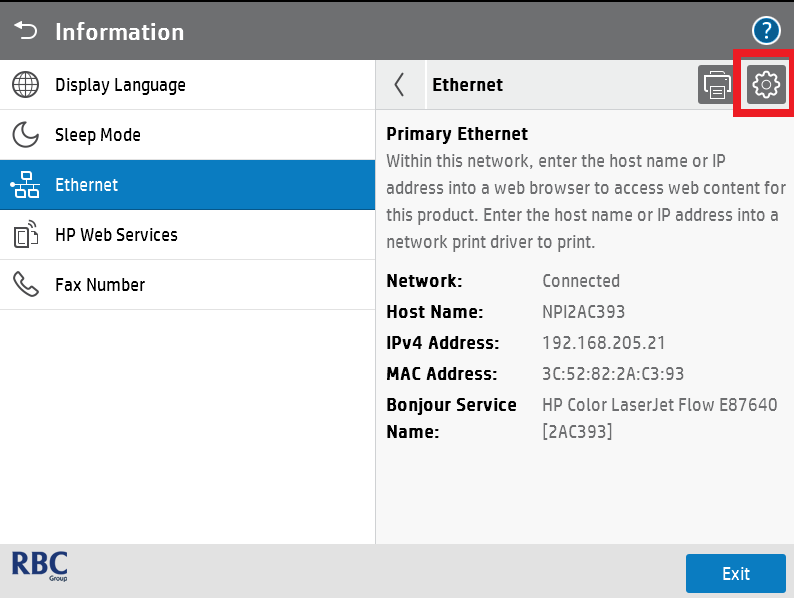
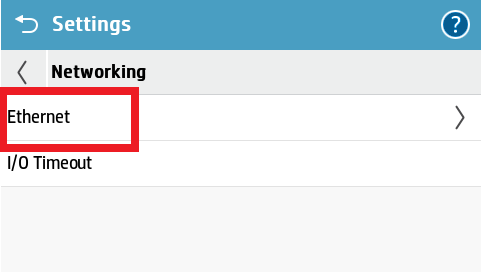
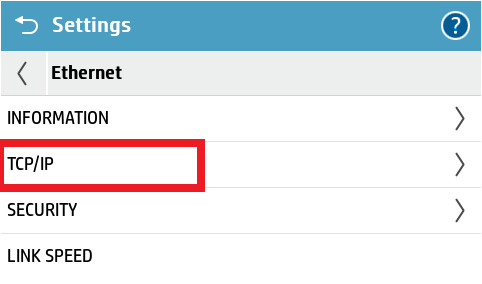
4. Select Ethernet as shown below.
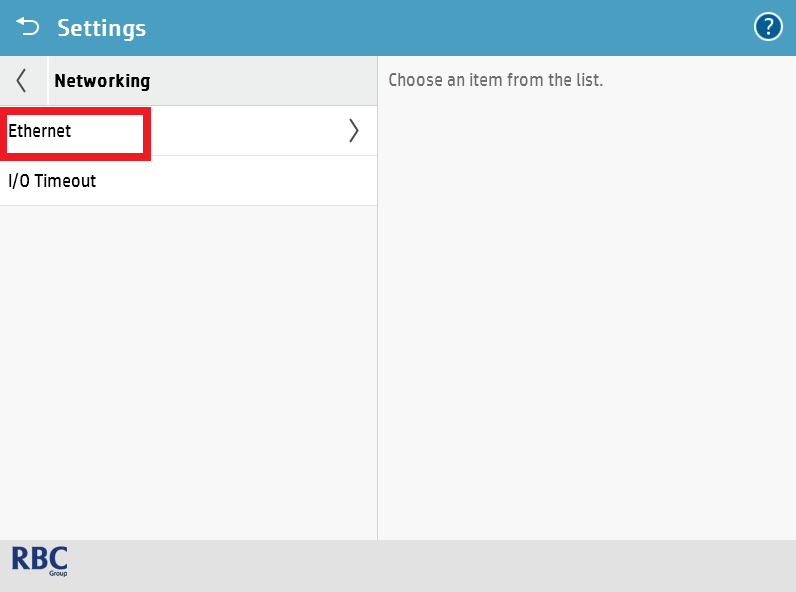
5. Select TCP/IP.
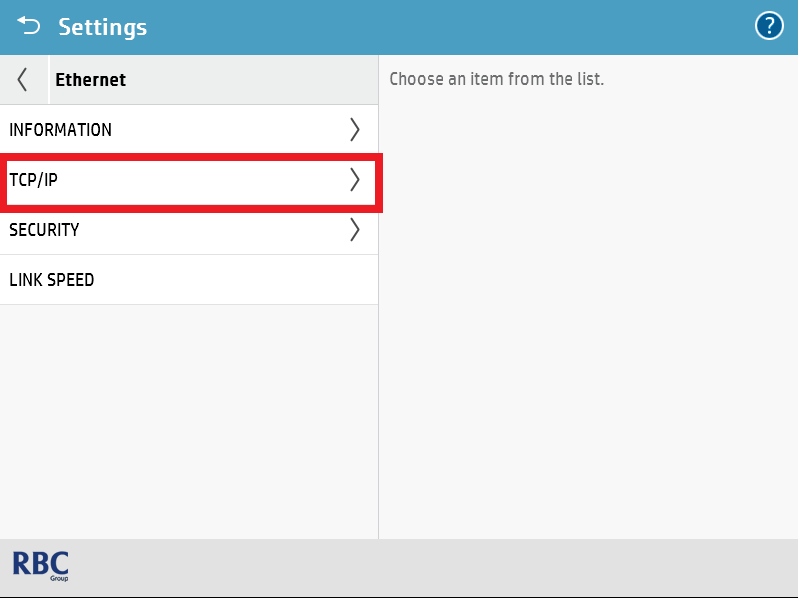
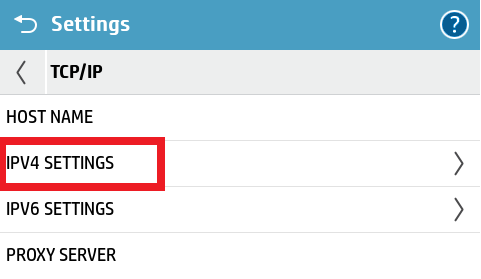
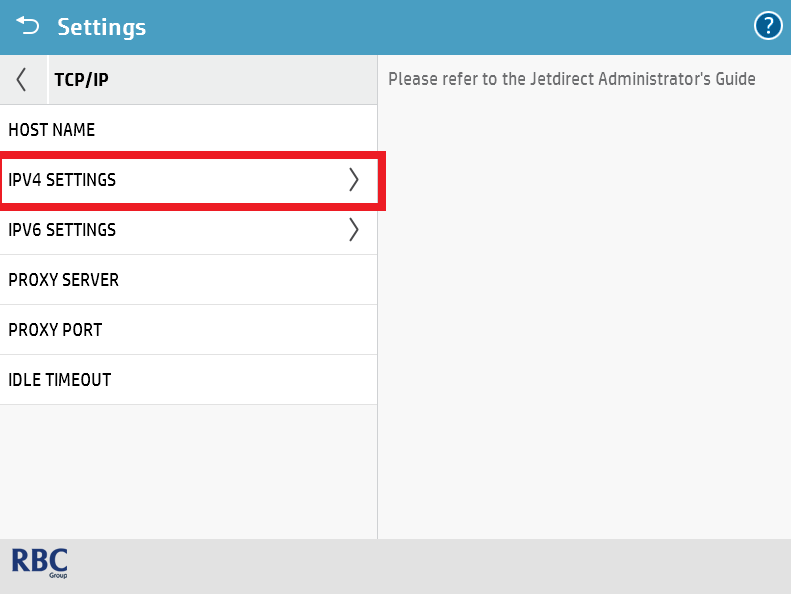
6. Select IPV4 Settings.
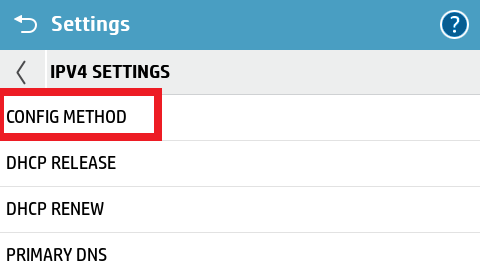
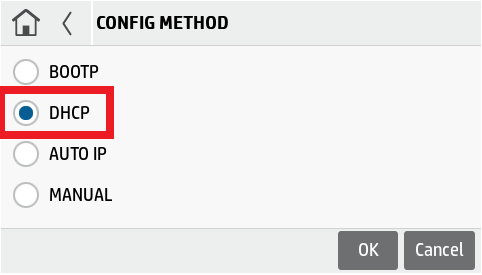
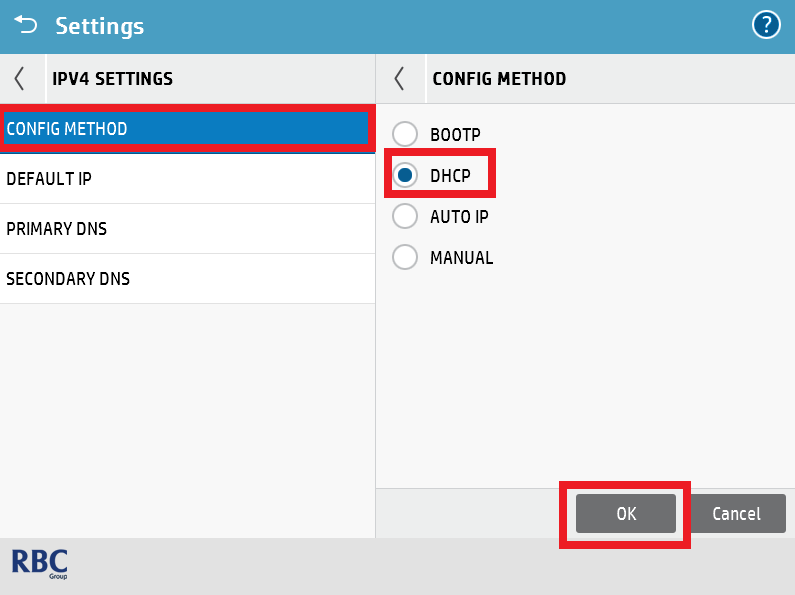
7. Please select Config Method and select DHCP as shown below. Please ensure that you click OK to apply the settings. To double check this, please click back and select Config Method again to make the machine is set to DHCP.
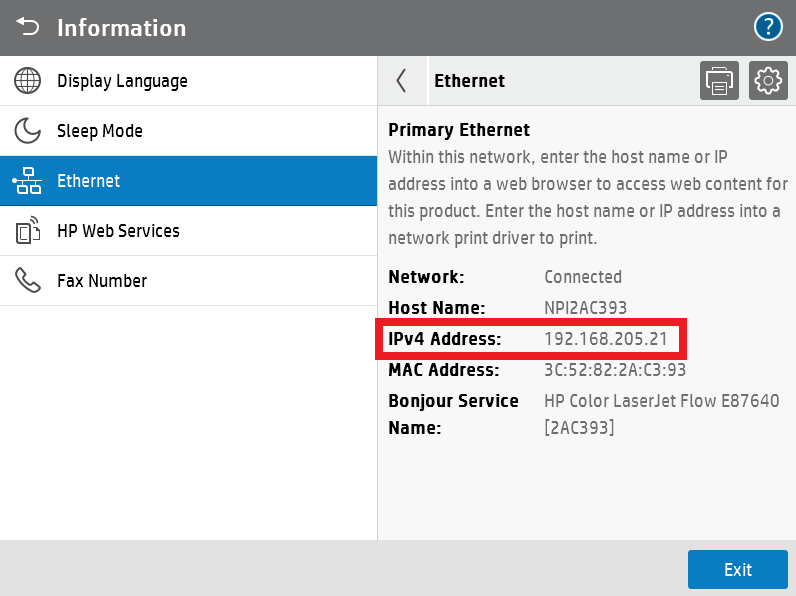
8. Verify the IP address has changed by navigating back to the Ethernet information menu.
Need further help?
HP E4 A4 Machines
1. Please click the  button at the top right hand corner of the Home Page.
2. Select the Ethernet tab along the left hand side.
3. Select the Settings Cog Icon on the top right hand side of the Ethernet tab.
4. Select Ethernet as shown below.
5. Select TCP/IP.
6. Select IPV4 Settings.
7. Please select Config Method and select DHCP as shown below. Please ensure that you click OK to apply the settings. To double check this, please click back and select Config Method again to make the machine is set to DHCP.
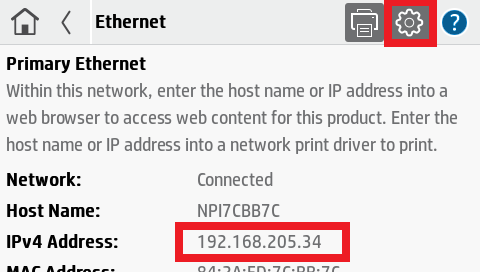
8. Verify the IP address has changed by navigating back to the Ethernet information menu.
Need further help?
